mirror of https://github.com/pikvm/pikvm.git
195 lines
8.1 KiB
Markdown
195 lines
8.1 KiB
Markdown
# Ethernet-over-USB network
|
|
|
|
Specifically to PiKVM V2+. When combined with configuring a DNS server, FTP, or SMB (for example), this is a powerful way to extend the capabilities of PiKVM.
|
|
|
|
-----
|
|
## Basic configuration
|
|
|
|
{!_usb_limits.md!}
|
|
|
|
!!! info
|
|
|
|
Before exploring this page, we recommend to read the [PiKVM configuration guide](config.md)
|
|
so that you understand the terminology and how exactly the parameters described below change.
|
|
|
|
1. Edit `/etc/kvmd/override.yaml` and add these lines:
|
|
|
|
``` yaml
|
|
otg:
|
|
devices:
|
|
ethernet:
|
|
enabled: true
|
|
driver: ecm
|
|
host_mac: 48:6f:73:74:50:43
|
|
kvm_mac: 42:61:64:55:53:42
|
|
```
|
|
|
|
The `enable: true` option was used for activation the USB network. The values of the remaining options are described in the tables.
|
|
|
|
| Parameter | Default | Description |
|
|
|------------|------------|-------------|
|
|
| `host_mac` | `<random>` | The MAC address of the host's network interface. |
|
|
| `kvm_mac` | `<random>` | The MAC address of the network interface on the PiKVM side called `usb0`. |
|
|
| `driver` | `ecm` | Protocol driver of the USB network. Different drivers are required for different OS. See below. |
|
|
|
|
| Driver | Compatibility with Operating Systems|
|
|
|--------|-------------------------------------|
|
|
| ecm | Linux; Mac OS |
|
|
| eem | Linux |
|
|
| rndis5 | Windows XP...7 <sup>[1](#rndis5)</sup>; Linux > 2.6.13 |
|
|
| rndis | Windows >= 7 <sup>[2](#rndis)</sup>; Linux > 2.6.13 |
|
|
| ncm | Windows >= 10; Linux > 2.6.37; Mac OS |
|
|
|
|
<a name="rndis5">1</a>: Manual driver installation is required. [Download RNDIS 5 Windows](driver/win/pikvm-rndis5.inf)<br>
|
|
<a name="rndis">2</a>: Automatic driver installation since KVMD 3.53.
|
|
|
|
2. To automatically configure the USB network on the host recommended using the service `kvmd-otgnet`.
|
|
It configures the firewall, assigns an address to the local PiKVM interface `usb0` and starts DHCP so the target host can get the IPv4 address.
|
|
|
|
By default, the address `172.30.30.1/24` to interface `usb0` will be assigned.
|
|
One of the other addresses from the network `172.30.30.0/24` will be assigned to the host when it requests it via DHCP.
|
|
|
|
For security reasons, all incoming connections from the host to the PiKVM side are blocked (except for ICMP and UDP port 67 which is used for DHCP).
|
|
If you want to allow access from the host to the PiKVM interface, you will need to add ports 80 and 443 to the whitelist using `/etc/kvmd/override.yaml`
|
|
file like this:
|
|
|
|
```yaml
|
|
otgnet:
|
|
firewall:
|
|
allow_tcp: [80, 443]
|
|
```
|
|
|
|
Other useful firewall options are listed here:
|
|
|
|
| Parameter | Default | Description |
|
|
|-----------------|----------|-------------|
|
|
| `allow_icmp` | `true` | Optional ICMP allowed to PiKVM. |
|
|
| `allow_tcp` | `[]` | List of allowed TCP connections from the host to PiKVM. |
|
|
| `allow_udp` | `[]` | List of allowed UDP connections from the host to PiKVM. |
|
|
| `forward_iface` | `<none>` | Default gateway interface on PiKVM for network forwarding (see below). |
|
|
|
|
See other parameters and command hooks in `kvmd -m`.
|
|
|
|
3. To enable the service, use the command `systemctl enable kvmd-otgnet`.
|
|
|
|
4. Perform `reboot`.
|
|
|
|
|
|
## Routing via PiKVM
|
|
|
|
By default, `kvmd-otgnet` will configure network connection between PiKVM and the host only.
|
|
The target host controlled by PiKVM will not be able to reach other hosts beyond PiKVM.
|
|
If the full network access is required from the host through the USB-Ethernet feature (access all hosts PiKVM can access),
|
|
additional settings are needed in `/etc/kvmd/override.yaml`.
|
|
|
|
1. Run `echo "net.ipv4.ip_forward = 1" > /etc/sysctl.d/99-kvmd-extra.conf`.
|
|
|
|
2. Add network interface to forward requests to (default gateway) by adding a line `forward_iface: <interface name>` under the `firewall` section.
|
|
Typically it would be `eth0` if the built-in ethernet port is used::
|
|
|
|
```yaml
|
|
otgnet:
|
|
firewall:
|
|
forward_iface: eth0
|
|
```
|
|
|
|
3. Add DNS server to provide host name resolution service.
|
|
For example, adding `8.8.8.8` as DNS server requires addition of `dnsmasq` dhcp options.
|
|
This can be done by adding following lines:
|
|
|
|
```yaml
|
|
otgnet:
|
|
commands:
|
|
post_start_cmd_append:
|
|
- "--dhcp-option=6,8.8.8.8"
|
|
```
|
|
|
|
4. Combining above two together::
|
|
|
|
```yaml
|
|
otgnet:
|
|
firewall:
|
|
forward_iface: eth0
|
|
commands:
|
|
post_start_cmd_append:
|
|
- "--dhcp-option=6,8.8.8.8"
|
|
```
|
|
|
|
5. To enable internet access for the target host, add the following to the otgnet configuration::
|
|
|
|
```yaml
|
|
otgnet:
|
|
iface:
|
|
net: 10.65.0.0/28
|
|
```
|
|
|
|
The 'net' parameter defines the network address range of the `usb0` network.
|
|
The host will automatically receive an IP address within this network including the DNS servers defined under 'post_start_cmd_append'.
|
|
Note: This network should *not* be same as the network PiKVM is connected to.
|
|
|
|
See other parameters and command hooks in `kvmd -m`.
|
|
|
|
6. Don't forget to `reboot`.
|
|
|
|
??? example "An example of what the config would look like for a host that can access PiKVM and has internet access:"
|
|
|
|
```
|
|
otgnet:
|
|
firewall:
|
|
allow_tcp: [80, 443]
|
|
forward_iface: wlan0
|
|
commands:
|
|
post_start_cmd_append:
|
|
- "--dhcp-option=6,1.1.1.1,1.0.0.1"
|
|
iface:
|
|
ip_cmd:
|
|
- /usr/bin/ip
|
|
net: 10.65.0.0/28
|
|
```
|
|
|
|
|
|
## Working with Windows Computers
|
|
This has been proven to work with Windows:
|
|
|
|
1. Set the driver type to **rndis** (see above).
|
|
|
|
2. Download [this driver](https://modclouddownloadprod.blob.core.windows.net/shared/mod-rndis-driver-windows.zip) on the Windows machine and unzip it somewhere.
|
|
|
|
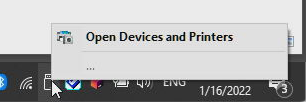
3. Open the devices manager:<br>
|
|
|
|
|
|
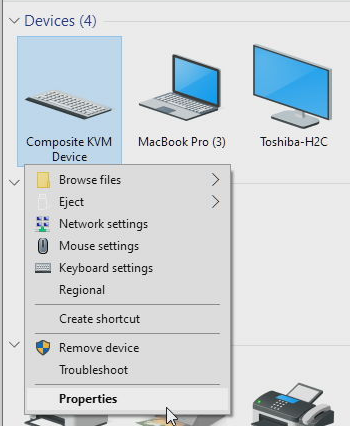
4. Select **Properties** of the **Composite KVM Device**:<br>
|
|
|
|
|
|
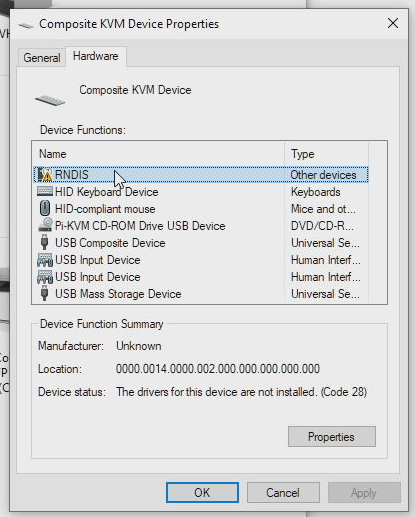
5. Select the **RNDIS Device** and click properties:<br>
|
|
|
|
|
|
6. Switch to the **Driver** tab and then click **Update driver**.
|
|
|
|
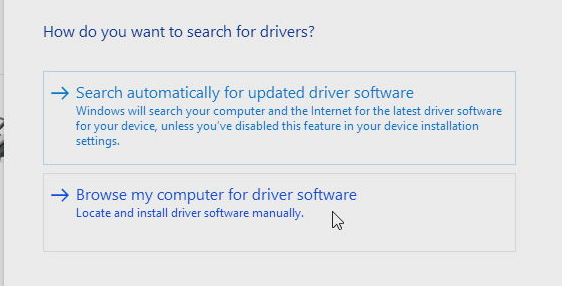
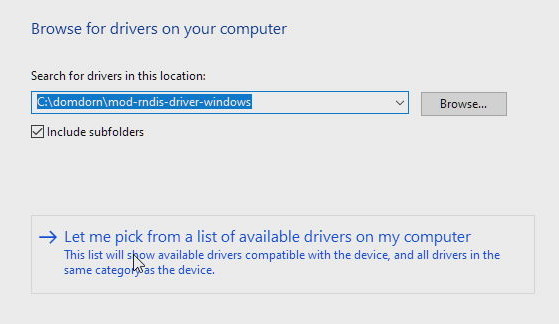
7. Click **Browse my computer for driver software**:<br>
|
|
|
|
|
|
8. Click **Let me pick from a list of available drivers on my Computer**:<br>
|
|
|
|
|
|
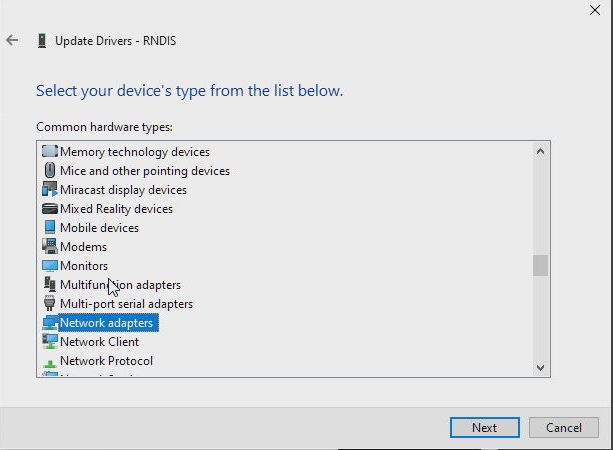
9. From the list of available hardware types, scroll down and select **Network adapters**, then click **Next**:<br>
|
|
|
|
|
|
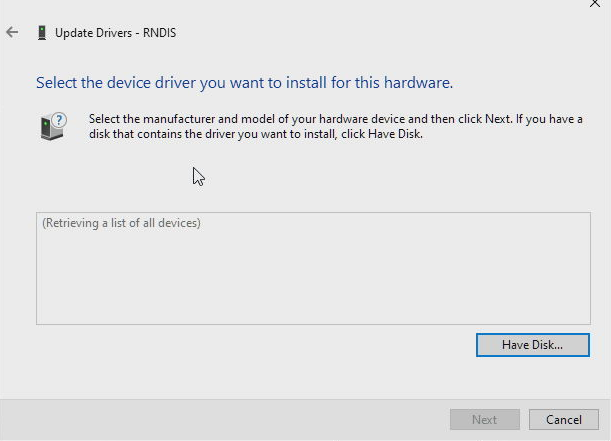
10. Click **Have disk**:<br>
|
|
|
|
|
|
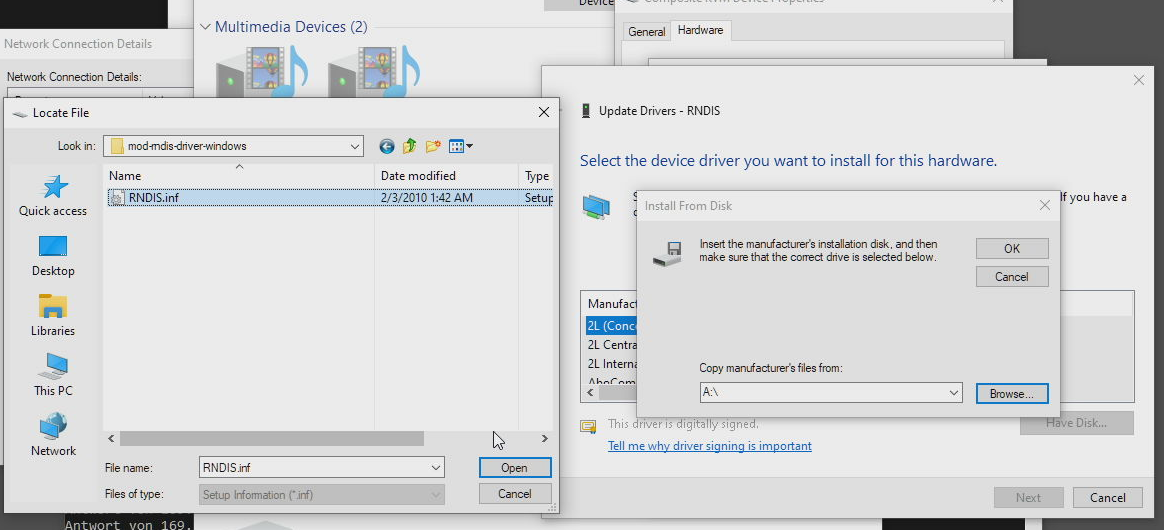
11. Click Browse, navigate to the folder where you've stored the driver and select the **RNDIS.inf**, press **Open** and then **OK**:<br>
|
|
|
|
|
|
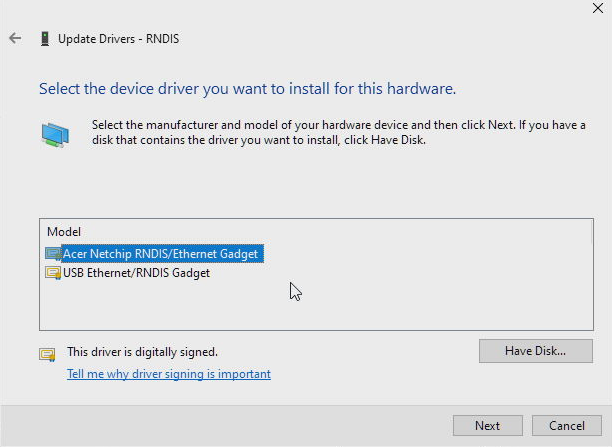
12. Select **Acer Netchip RNDIS/Ethernet Gadget** and click **Next**:<br>
|
|
|
|
|
|
13. Dismiss the warning about non-compatible drivers by clicking **Yes**:<br>
|
|

|
|
|
|
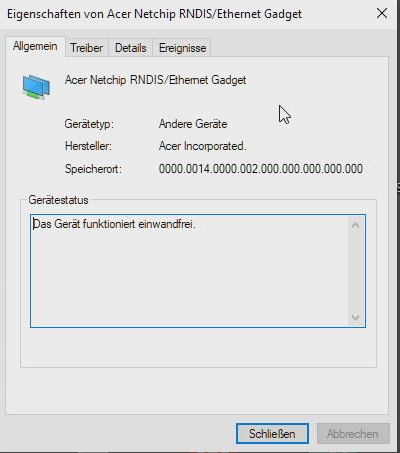
14. You're done - the device should now be recognized:<br>
|
|
|
|
|
|
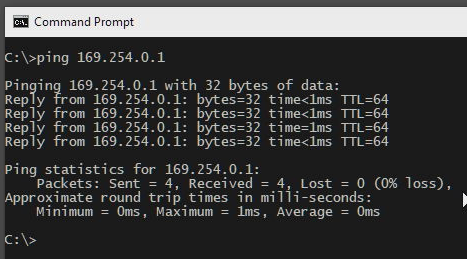
15. Verify the card is working by pinging your PiKVM in a console: `ping 172.30.30.1`:<br>
|
|
|